Summary
Ever since I bought a smart coffee kettle, I wanted to automate it so I wouldn’t have to set the temperature every time. So I built this system.
What You’ll Need
I’ll walk you through how to set this up. Here’s what you’ll need:
- A smart kettle (mine is from Govee)
- Google Sheets
- Home Assistant
- a smart button of your choice
You’ll need to set up your Google Sheet with columns for coffee type, grind size, temperature, and more. Create a row labeled “active” to indicate which profile is currently in use. Here’s the structure I use:
coffee,rosy,aeropress grind,aeropress temp,pourover grind,pourover temp,barcode,active
Copy this exactly into your sheet. Next, make sure the table located at the bottom of the sheet is spelled exactly as shown in these images:

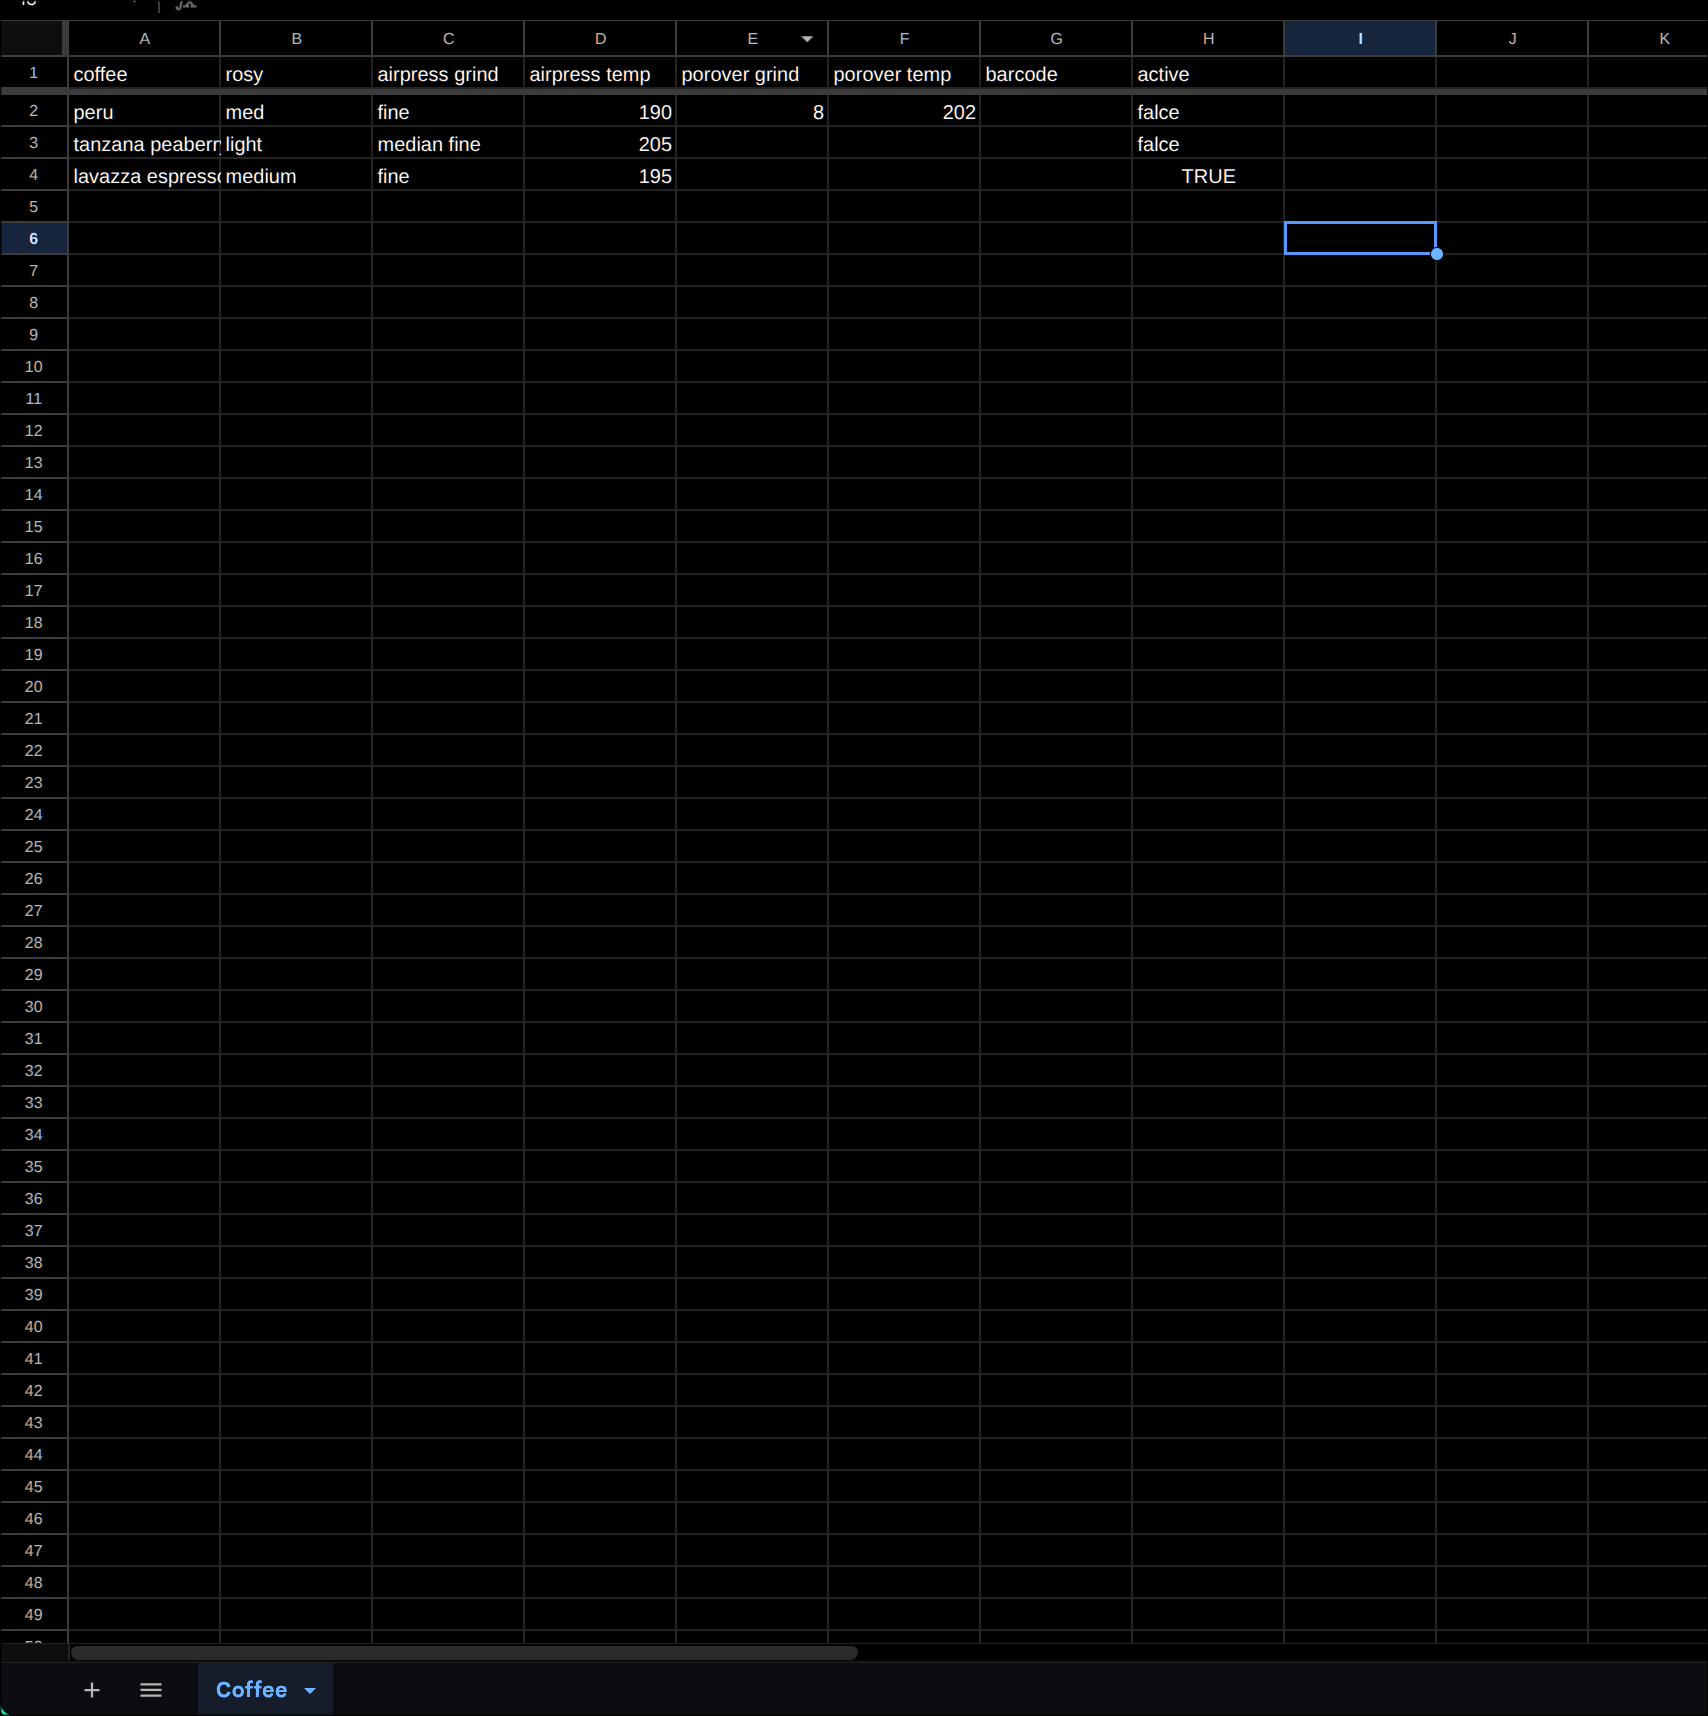

This is critical—the automation won’t work if the table name is incorrect.
Set Up Google Apps Script
Go to Extensions → Apps Script and copy this code into the editor:
function doGet() {
  const sheet = SpreadsheetApp.getActiveSpreadsheet().getSheets()[0];
  const data = sheet.getDataRange().getValues();

  const headers = data[0];
  const rows = data.slice(1);

  for (let row of rows) {
    let obj = {};
    headers.forEach((header, index) => {
      obj[header.trim()] = row[index];
    });

    if (obj.active === true || obj.active === "TRUE") {
      return ContentService
        .createTextOutput(JSON.stringify(obj))
        .setMimeType(ContentService.MimeType.JSON);
    }
  }

  return ContentService
    .createTextOutput(JSON.stringify({ error: "No active coffee" }))
    .setMimeType(ContentService.MimeType.JSON);
}
Make sure you set the “active” column to TRUE (all capitals) for the profile you want to use. After you deploy it, copy the web app URL—you’ll need this next.
Configure Home Assistant
In your Home Assistant configuration.yaml, add this sensor configuration:
sensor:
  - platform: rest
    name: Coffee Profile
    resource: "YOUR_WEB_APP_URL"
    value_template: "{{ value_json.coffee }}"
    json_attributes:
      - aeropress temp
      - pourover temp
    scan_interval: 60
Replace YOUR_WEB_APP_URL with the URL you copied from Google Apps Script.
Set Up Home Assistant Automation
Add this to your scripts.yaml file:
brew_aeropress:
  alias: Brew – AeroPress
  sequence:
    - service: number.set_value
      target:
        entity_id: number.smart_kettle_target_temperature
      data:
        value: "{{ state_attr('sensor.coffee_profile','aeropress temp') | int }}"
    - delay: "00:00:02"
    - service: switch.turn_on
      target:
        entity_id: switch.smart_kettle

brew_pourover:
  alias: Brew – Pour Over
  sequence:
    - service: number.set_value
      target:
        entity_id: number.smart_kettle_target_temperature
      data:
        value: "{{ state_attr('sensor.coffee_profile','pourover temp') | int }}"
    - delay: "00:00:02"
    - service: switch.turn_on
      target:
        entity_id: switch.smart_kettle
These scripts let you control your kettle with a button press. Now you need to create the automations. Note that I have both an AeroPress and a Pour Over setup. You’ll need to change the button device IDs to match your own devices, but that should be straightforward.
AeroPress Automation
- alias: Zigbee Button – AeroPress
  trigger:
    - platform: device
      device_id: aedb48488c249fcc28f0be1d85f4174f
      domain: zha
      type: remote_button_short_press
      subtype: button_1
  action:
    - service: script.brew_aeropress
  mode: single
Pour Over Automation
- alias: Zigbee Button – Pour Over
  trigger:
    - platform: device
      device_id: aedb48488c249fcc28f0be1d85f4174f
      domain: zha
      type: remote_button_double_press
      subtype: button_1
  action:
    - service: script.brew_pourover
  mode: single